Homesense sent me a £20 voucher and tasked me with creating a Halloween post… so here’s how I got on!
I popped into my local Homesense Chelmsford and browsed the homeware range; I found dozens of pretty little trinket skulls, big skull flower pot heads and rows and rows of Halloween gifts and accessories.
It was only when I had an armful of skull accessories that James said, “Why don’t you bake something for Halloween?”.
So I put everything back and headed upstairs to the Food Emporium section, where I was in absolute heaven!
After bouncing ideas off each other for half an hour, I ended up buying the 3D skull cake tin, 3D embossed cake tin, brains cupcake kit and little Halloween bits like chocolate eyeballs and Halloween cake decorators.


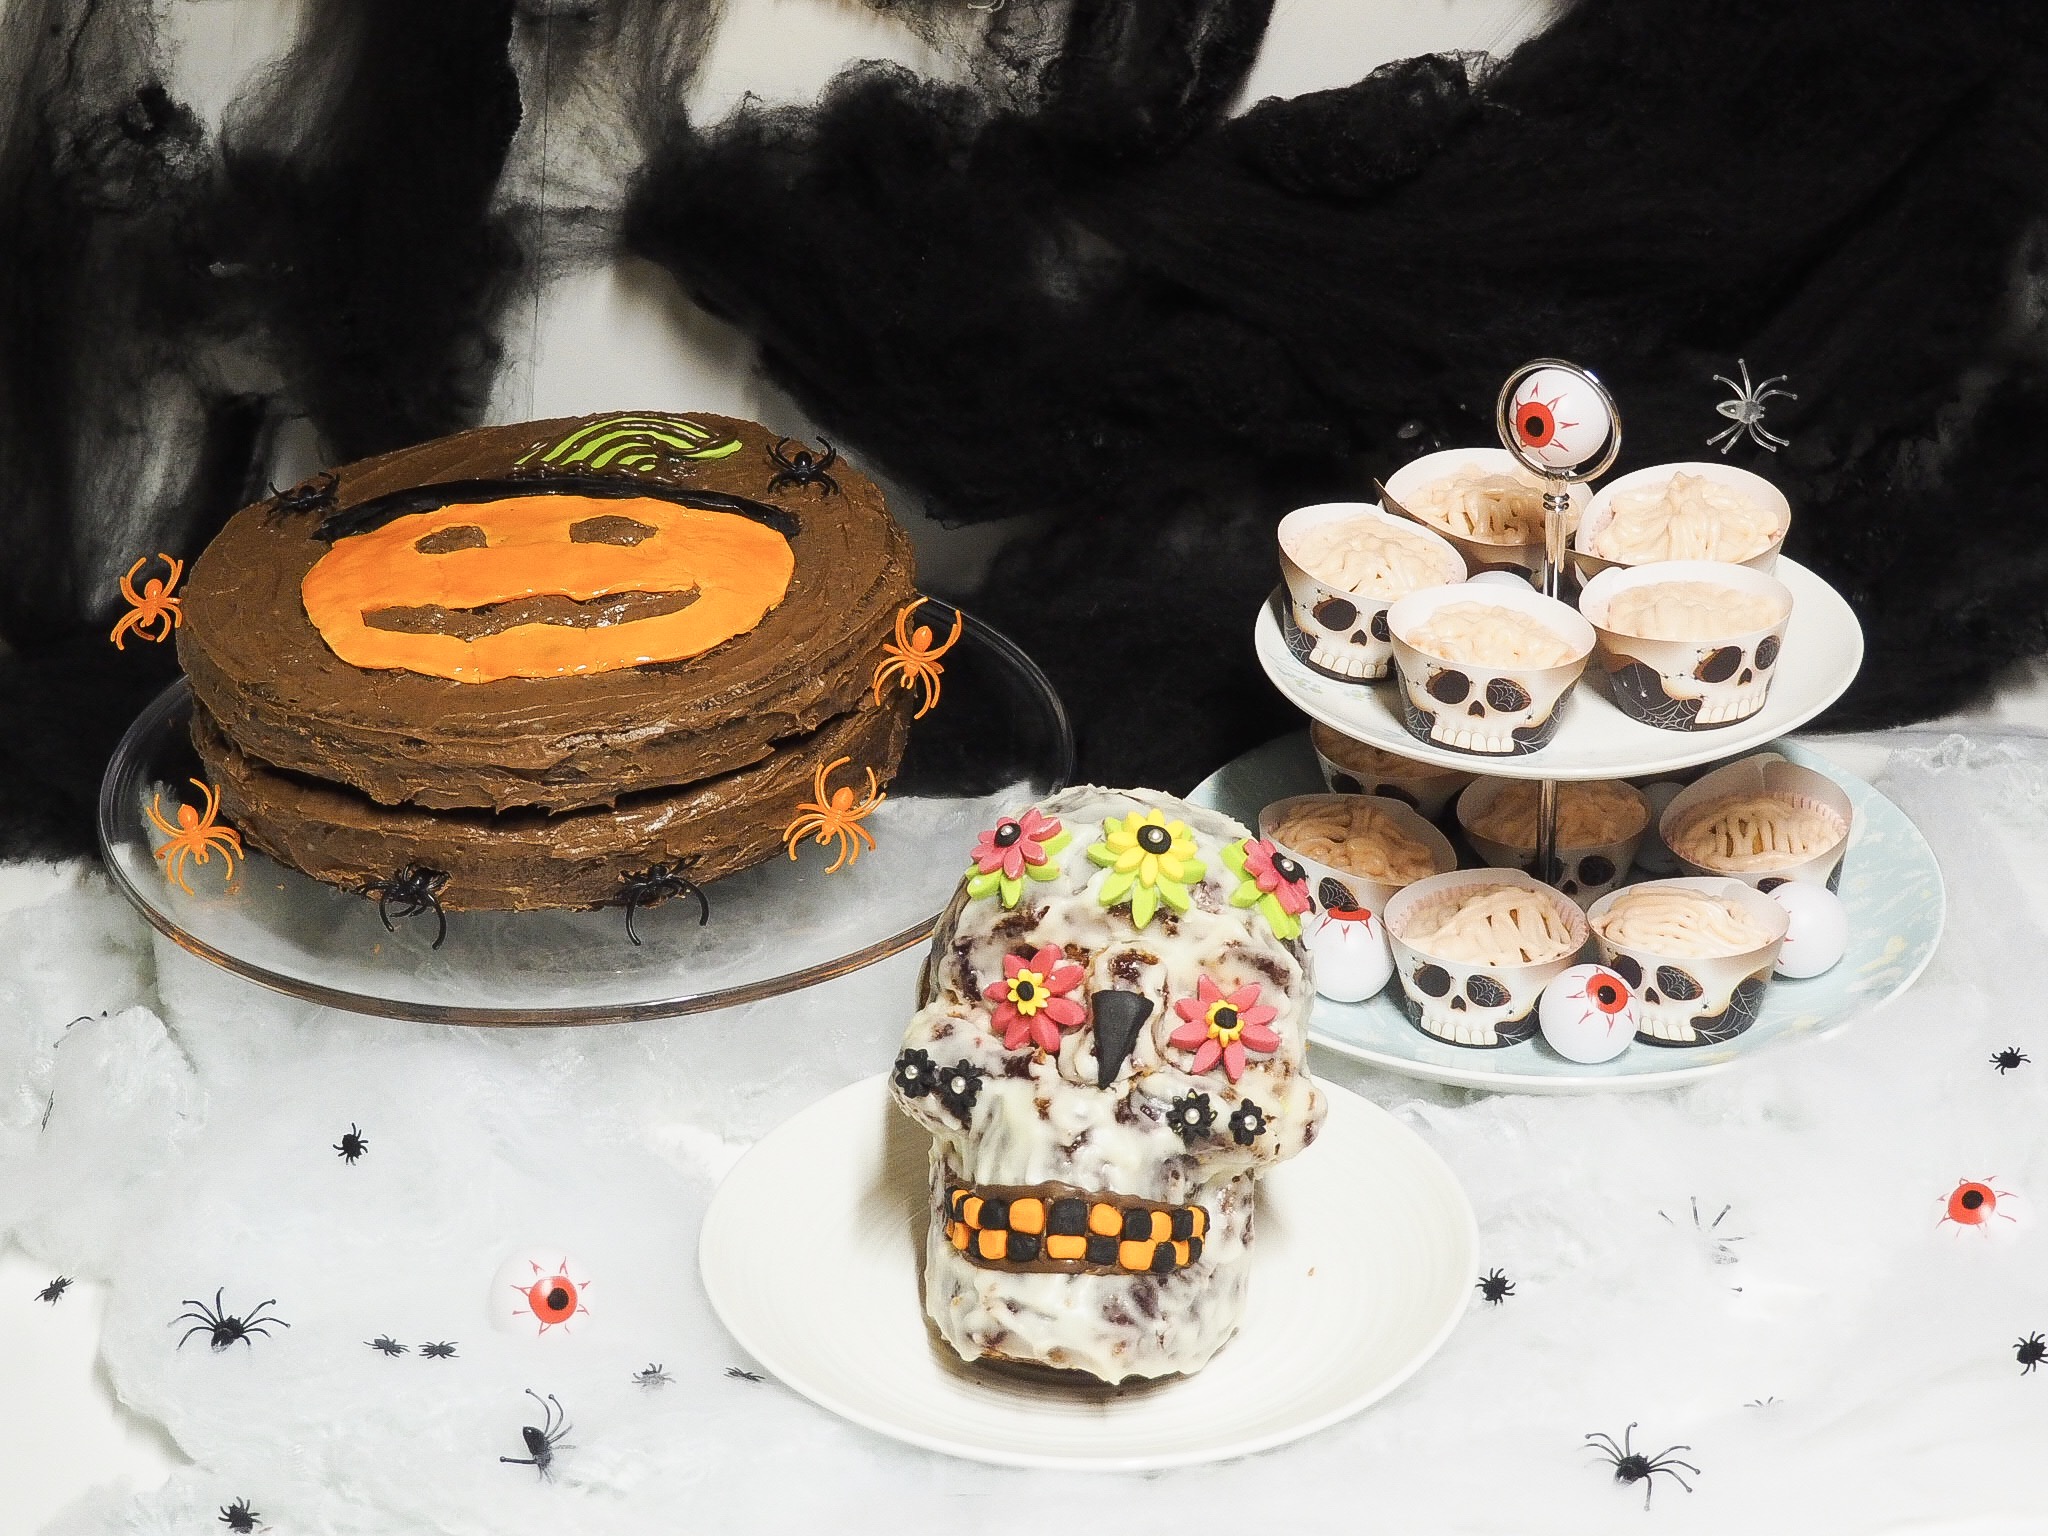
I used the 3D skull cake tin to make this beast of a cake!
I used Mum’s basic victoria sponge recipe and baked the cake in two halves. I let it cool down, and then Mum *very* delicately got it out of the metal mould. I melted some raspberry jam in the microwave for 30 seconds and crumb coated the cake to give it a solid base.
The next day, I made up a easy buttercream recipe and smothered the skull cake in it. I let this cool and set too, then used my flower cutters to cut different coloured flowers to decorate the skull with. I decorated a few with mini silver balls and used a chocolate pen to create the mouth.
It was a tricky cake to decorated and get to stand up, but it was well worth the challenge! I think it looks really effective and it tastes great, too!
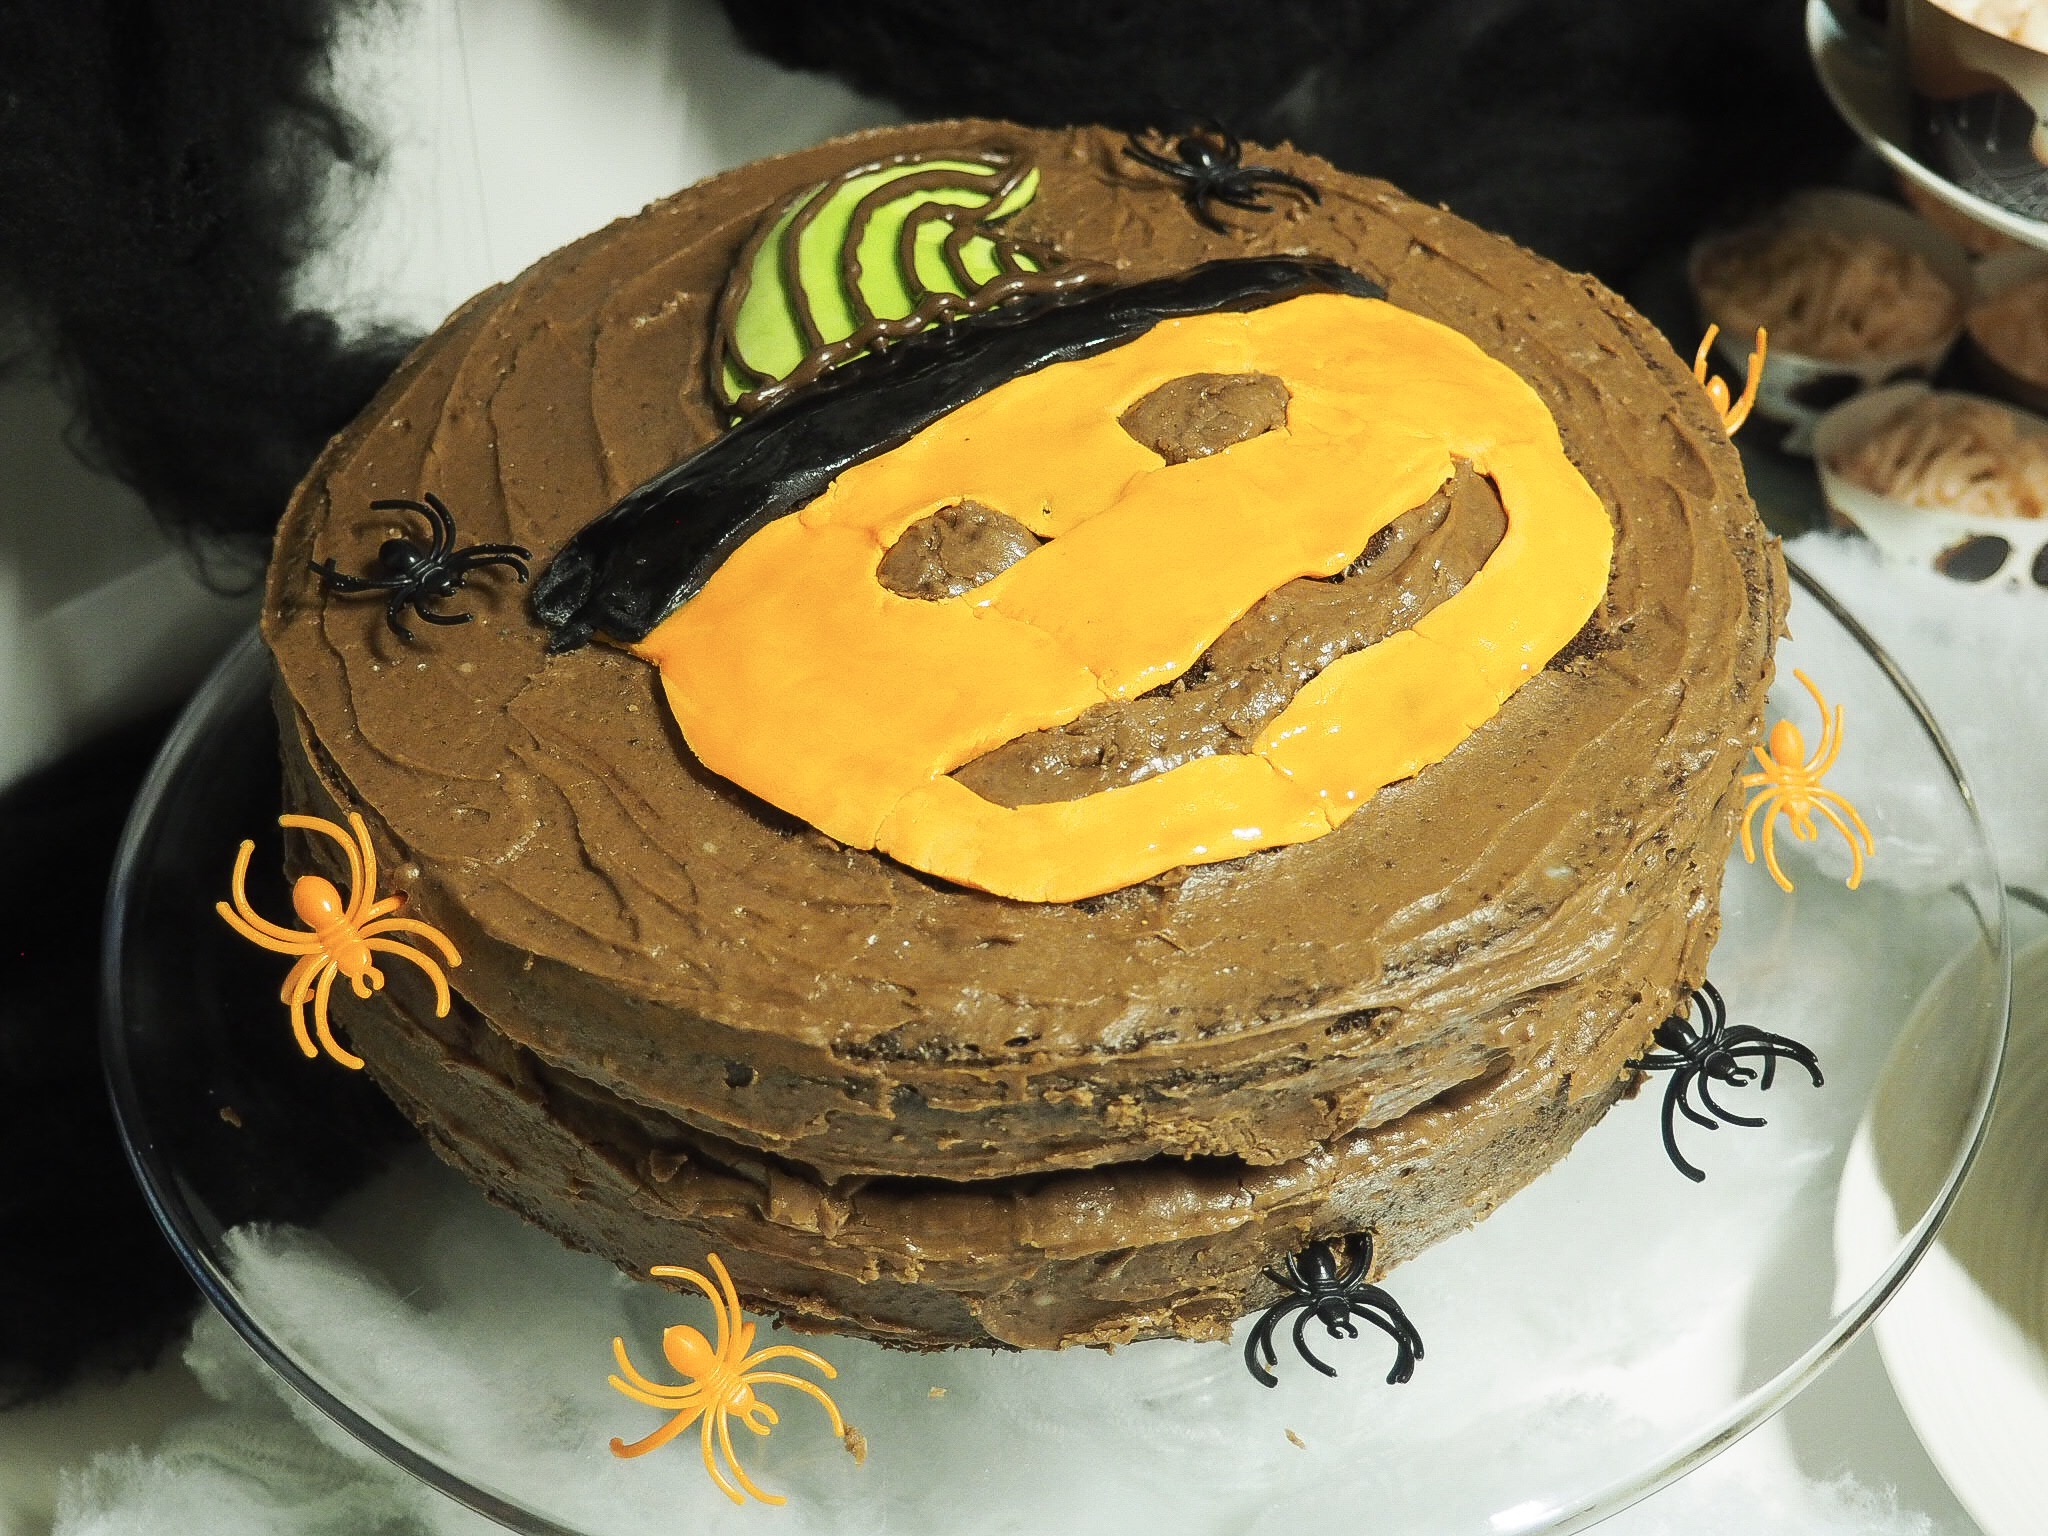

For the second sponge, I used the 3D embossed cake tin to create a chocolate and salted caramel cake with salted caramel ganache and an iced fondant topping!
The cake tin set came with one cake tin and two embossed trays; a pumpkin one and a bat one. The embossed trays created a 3D effect on the cake, so I chose the pumpkin template as I thought it would be more effective. To use it, you just place the tray onto the bottom of the tin, then pour your mixture on top.
The cake baked evenly and rose well, filling the room with a delicious chocolatey smell!
For decoration, I sandwiched the cake with salted caramel chocolate ganache and decorated the sides with it too. Then James cut out the pumpkin by hand on orange and green fondant and placed it on top, finishing off the cake with melted chocolate stripes.

The cake was deliciously soft and bouncy, and the salted caramel filling gooey and sweet. I can’t wait to use this tin again, and try the bat template out next year!
Last but not least, I made brain cupcakes using the brains cupcake kit.
The kit was easy to follow, and contained a vanilla cake mix, pink frosting and skull cake cases. I had to add butter, water and eggs to the cake mixture but it was easy to whip up and prepare.
The mixture baked well in around 15 minutes, and cooled down quickly whilst I prepared the pink frosting. I only needed to add a touch of water to create the pink frosting, and it was easy to pop into the piping bag provided. I practiced on a few cupcakes but James took over and certainly had a good technique at creating iced brains!
Once cool, I popped the cupcakes into the provided skull cake cases and voila, one easy cupcake recipe!
I decorated the cake stand with chocolate eyeballs and Halloween cake decorators, adding a fun touch to the brain cupcakes.
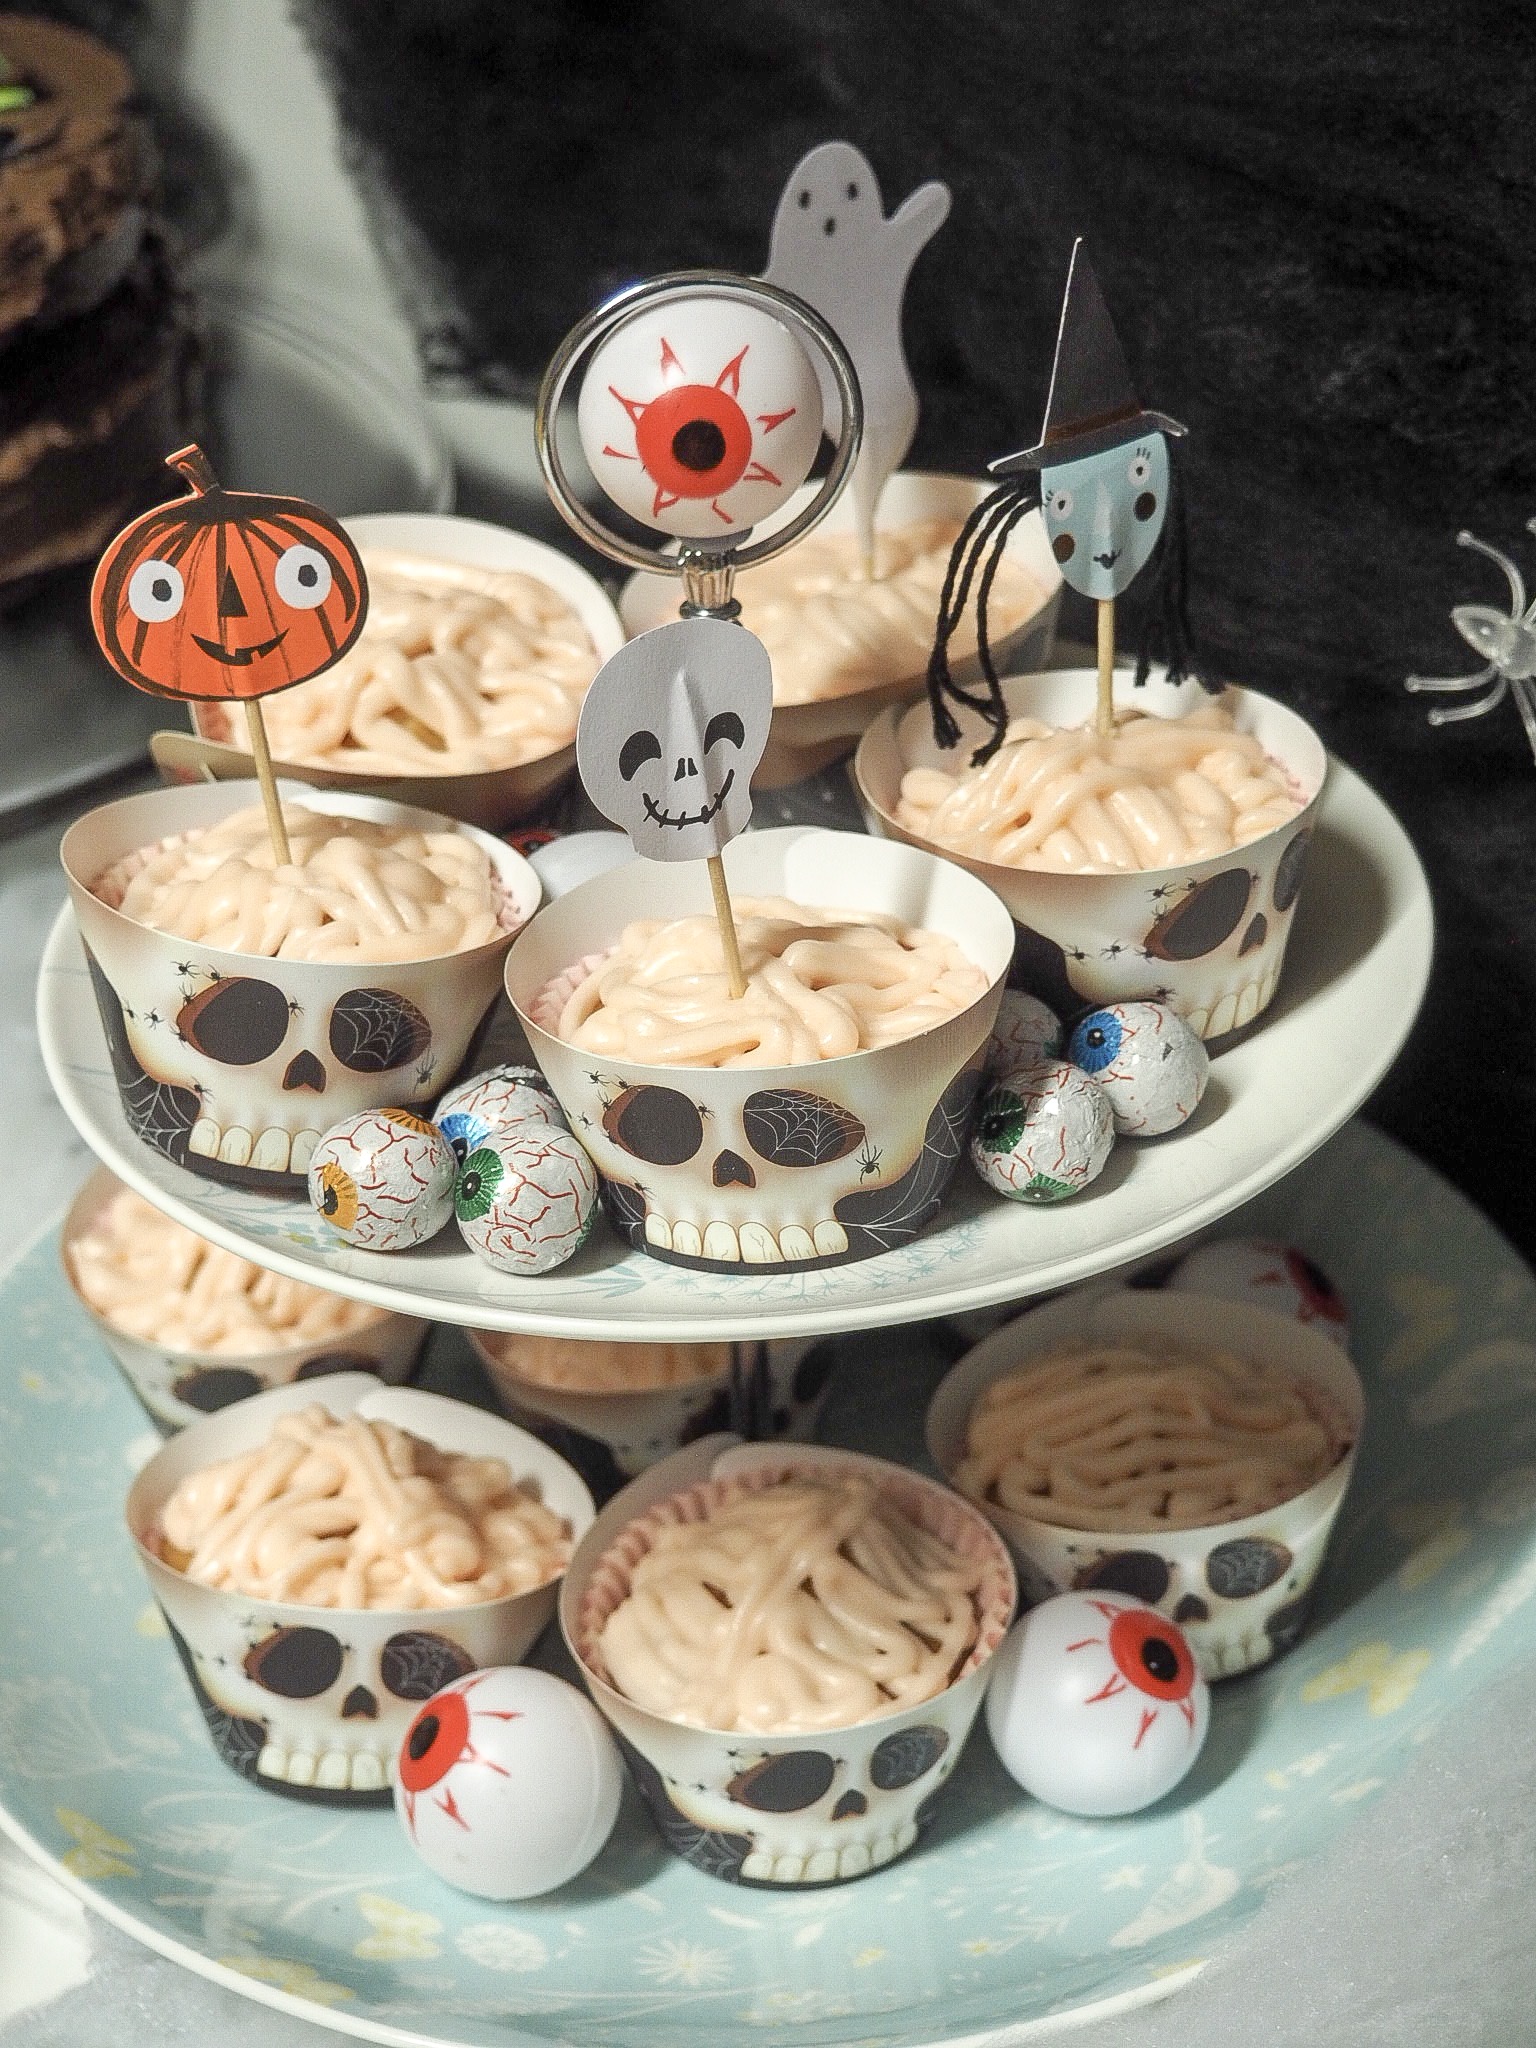

The vanilla cupcake set was crazy sweet, but the sponge was deliciously sweet and spongy. The pink frosting was very sweet but if you have a super sweet tooth, then it’ll be right up your street!
I love all the Halloween cooking bits I picked up in Homesense, and I can’t wait to carry on baking!
What are your favourite Halloween bakes?
These all look SO GOOD! Well done 🙂
That 3D skull cake tin is such a great idea!
Author
Yay thanks lovely!! I’m so glad it actually worked!
They all look so good especially the Skull head cake! 🙂 xx
Yasmina | The July Journal
Author
Thanks love, I’m chuffed with that one!
WHAAAAAT, you made all these?! BY HAND?! FROM SCRATCH?! Girl, come over to my house any time because your baking skills are on point. Love how they turned out!
☼ cabin twenty-four
Author
With the help of some great Homesense tins of course! 😉 thanks!
What cute looking bakes. I like the cupcakes and the skull cake, how nice they look. I will have a look at Homesense’s baking range.
Author
Homesense have some great baking products – I can’t wait to try their Christmas bits!
This looks awesome! I wish I could be a better baker. Homesense is one of my favorite shops, the quality of the products are amazing for the price.
Great posts
Holly x
Author
This is only my second batch of cakes I’ve made; it takes me aaaaaages but it’s good fun! Homesense is an amazing shop isn’t it!
This is such a cute idea. I’m totally going to get the brain cupcake kit for my nephew!